By Yamila Levalle, Security Researcher at Dreamlab Technologies
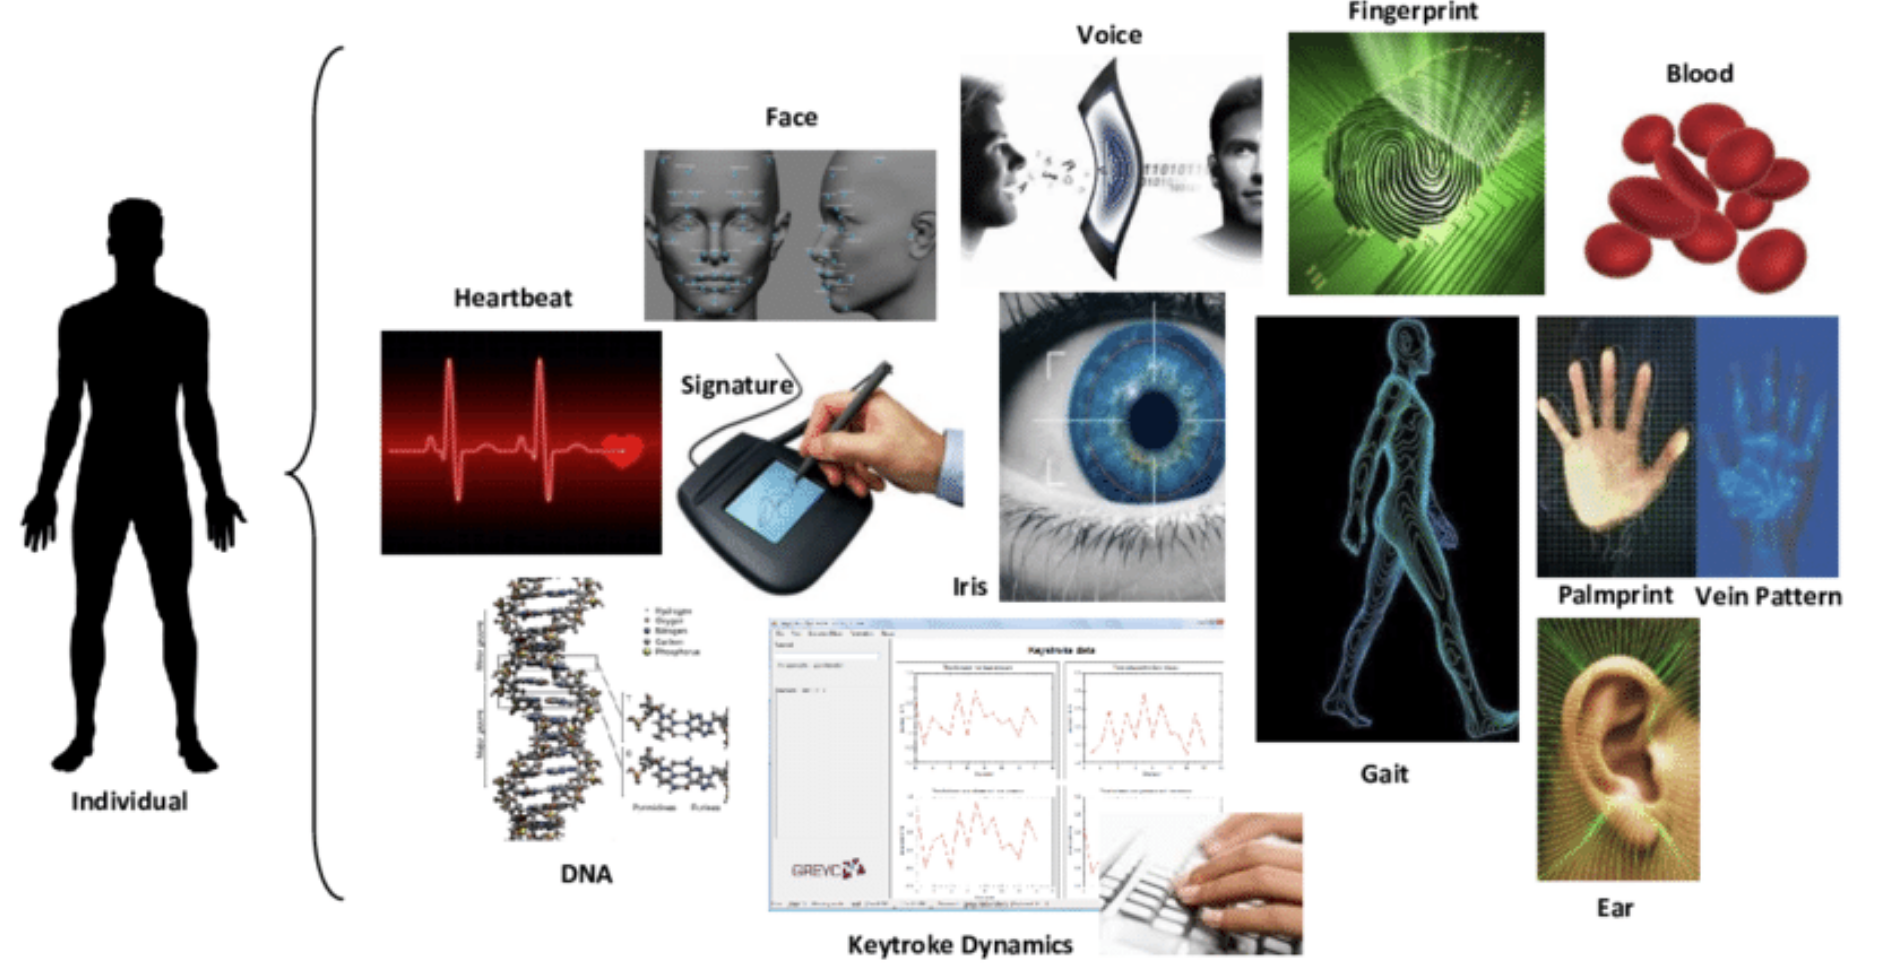
Humans have used features such as face, voice, and gait for thousands of years to recognize each other, but only recently, humans have started using biometric based systems to authenticate individuals. Biometrics is the science of establishing or determining an identity, based on the physical or behavioural traits of an individual such as fingerprints, DNA, signature, iris, face, voice, gait, vein pattern, ear shape and more.
Biometric systems are essentially pattern recognition systems that read biometric data as input, extract a feature set from the data, and finally compare it with a template set stored in a database. If the extracted feature set from the given input is close to a template set stored in the database, then the user is granted access.
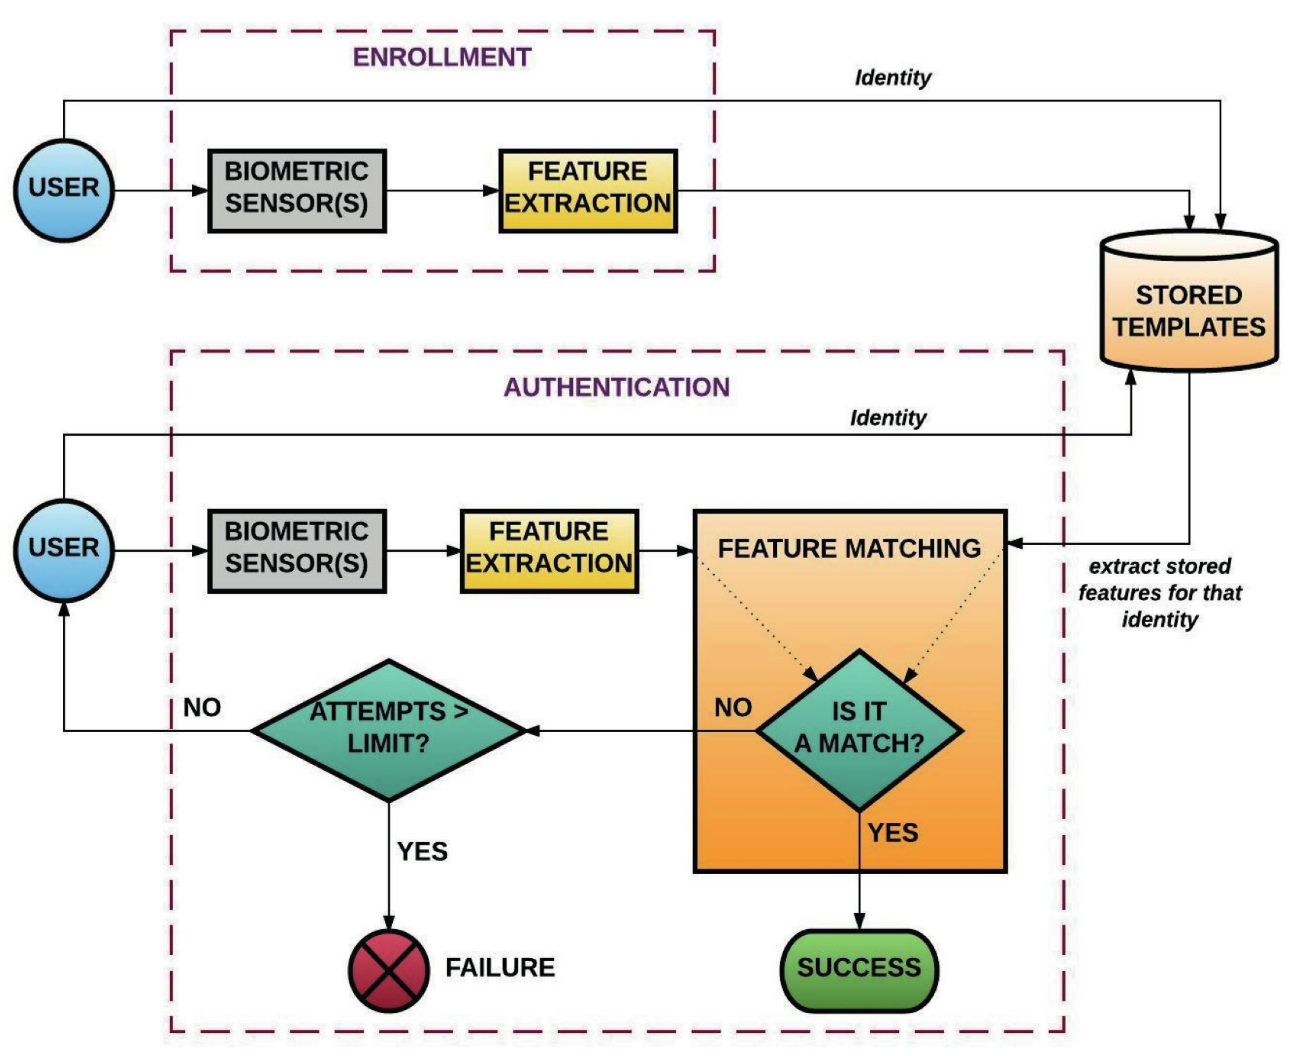
Figure 2 – Biometric Systems Recognition Process
Biometric systems are prone to different attacks.
- Direct attacks (presentation or spoofing attacks) are performed at the sensor level: the sensor is fooled rather than being replaced or tampered with.
- Indirect attacks are performed inside the biometric system by:
- bypassing or overriding the capture device, the signal processor, the comparator or the decision engine
- manipulating the data in the biometric reference database
- exploiting possible weak points in the communication channels between the components
This post will consider a specific type, presentation attacks in fingerprint biometric systems.

Figure 3 – Biometric Systems Attacks
A fingerprint is an impression left by the friction ridges of a human finger. The recovery of partial fingerprints from a crime scene is an important method of forensic science. Moisture and grease on a finger result in fingerprints on surfaces such as glass or metal. Deliberate impressions of entire fingerprints can be obtained by ink or other substances transferred from the peaks of friction ridges on the skin to a smooth surface such as paper. Human fingerprints are detailed, nearly unique, difficult to alter, and durable over the life of an individual, making them suitable as long-term markers of human identity.
But what is the fingerprint recognition process? Most fingerprint scanners compare distinctive features of the fingerprint, generally known as minutiae. Typically, investigators concentrate on points where ridge lines end or where one ridge splits into two, called bifurcations. Collectively, these and other distinctive features such as deltas, islands, spurs, bridges and ridge endings are called typica.
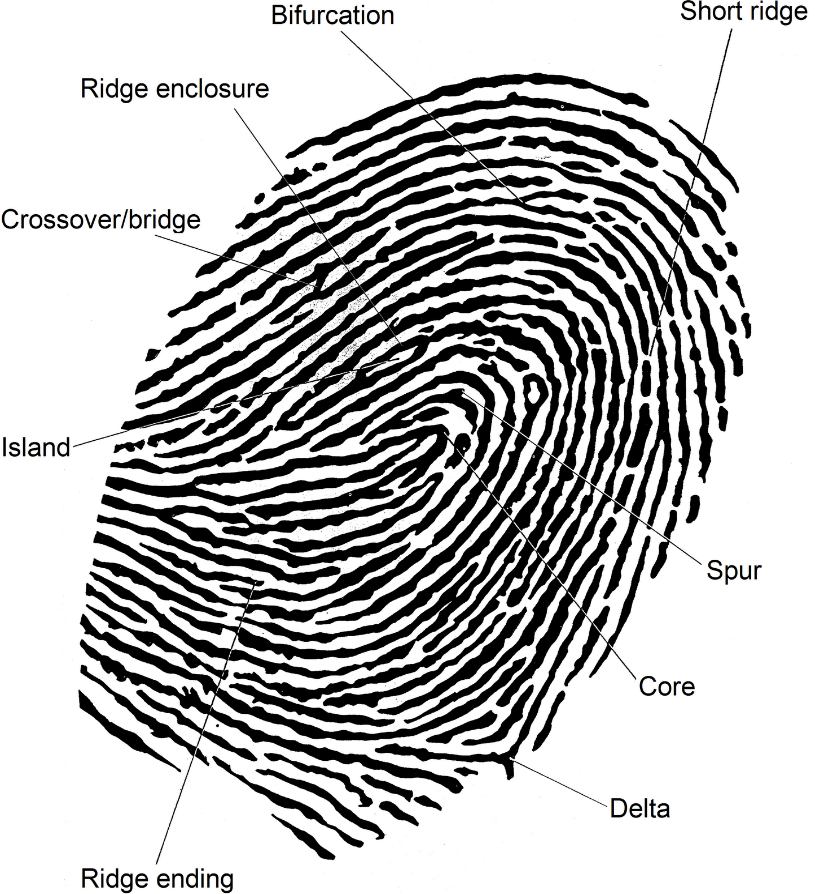
Figure 4 – Fingerprint Minutiae
The scanner uses complex algorithms to recognize and analyse these distinctive features. The basic idea is to measure the relative positions of the features, in the same sort of way that a part of the night sky can be recognised by the relative positions of stars.
To obtain a match, the scanner doesn’t have to find the entire pattern of distinctive features, both in the sample and in the print from the biometric database, it simply has to find a sufficient number of features and patterns that the two prints have in common.
There are many different fingerprint sensors on the market: optical sensors, capacitive sensors and ultrasonic sensors.
- Optical fingerprint sensors are the oldest method of capturing and comparing fingerprints. This technique relies on capturing an optical image and using algorithms to detect unique patterns on the surface, by analysing the lightest and darkest areas of the image.
- Instead of creating a traditional image of a fingerprint, capacitive fingerprint sensors use the body’s natural capacitance to read the fingerprints. The charge stored in the capacitor will be changed slightly when a fingerвАЩs ridge is placed over the conductive plates, while a valley will leave the charge at the capacitor relatively unchanged. These changes can then be recorded and analysed to look for distinctive and unique fingerprint attributes.
- The latest fingerprint scanning technology is the ultrasonic sensor. To capture the details of a fingerprint, the hardware consists of both an ultrasonic transmitter and a receiver. An ultrasonic pulse is transmitted against the finger that is placed over the scanner. Some of this pulse is absorbed and some of it is bounced back to the sensor, depending upon the unique details of each fingerprint. The sensor calculates the intensity of the returning ultrasonic pulse at different points, resulting in a detailed reproduction of the scanned fingerprint.
The goal in this research was to test and demonstrate that researchers without previous experience in fingerprints or forensic science using a home UV resin 3D printer and with a low budget, can create fake fingerprints and use them to authenticate as another user in different types of fingerprint sensors (optical, capacitive and ultrasonic).
Four devices were tested : two biometric attendance systems with optical sensors (Hysoon FF395 and TA040) and two mobile phones (Samsung Galaxy S10 and A30) one with a capacitive sensor and the other with an ultrasonic sensor. Initially well-known attacks that have previously been used against fingerprint scanners were tried, to learn about the materials and techniques needed for the fake fingerprints to work:
- The first type of attack to test was the grease attack. For grease attacks a clear grease stain must be left on the surface of the fingerprint scanner. This stain must have most of the important features of the fingerprint left on the pad so that the scanner can reliably read the same line ends and curves that it detected on the previous user.¬†The idea of the attack is to gently press different materials such as gummy bears, Play-Doh, silicone fingertips and latex gloves against the fingerprint scanner without ruining the stain.¬†The problem with grease attacks is that in most cases, a regular grease stain on the scanner surface is not enough to fool the sensor. It must be enhanced with other substances to obtain better results when impersonating legitimate users, these substances must be transparent so that a user does not notice them and with ointment consistency to better enhance the fingerprint stain, so a new technique was developed, dubbed ¬Ђenhanced grease¬ї.
- The second type of attack to test was consensual or cooperative attacks. The term consensual suggests the user we are taking the fingerprint from is aware of the process and actively participates by pressing their finger into some kind of a mould. For moulds, alginate, epoxy putty, Play-Doh, hot glue and candle wax were used. For casting, silicone, home-made ballistic gelatin, liquid latex, synthetic resin and wood glue were used.
- The third type of attack to test was non-consensual or non-cooperative attacks. In these attacks the user does not participate actively and latent fingerprints are obtained in a non-cooperative way. Assuming the correct latent fingerprint has been identified, then for this attack the following steps are needed: lift the latent fingerprint, enhance it with glue fumes or fingerprint powder, digitally enhance the fingerprint with software, create a mould and then cast artificial fingers with silicone, liquid latex or wood glue.
Using all the knowledge obtained from the previous tests, it was then time to perform the tests for cloning fingerprints, using a 3D printer. For non-consensual attacks with 3D printing, a UV Resin 3D Printer, software to digitally enhance the latent fingerprint, a 3D CAD design tool like Tinkercad and a latent fingerprint in glass, or a fingerprint inked in paper were all required. The latent fingerprint could also be obtained directly from a fingerprint sensor or from a leaked biometric database.
To obtain a working fingerprint through 3D printing, the following steps were taken:
- Lift the latent fingerprint with a digital camera with macro functionality: The digital photo camera from the Samsung Galaxy S10 smartphone was used, which was able to take images up to 12 mega pixels in size to obtain a photo of a latent fingerprint on glass or a fingerprint inked on paper. The camera had a macro functionality which made it possible to get good, in-focus images of close objects.
- The latent fingerprint ridges are not always well-defined, for that reason an enhancement algorithm was used to improve the clarity of the ridge structures. In this case, a tool based on https://github.com/Utkarsh-Deshmukh/Fingerprint-Enhancement-Python¬†for digitally enhancing fingerprints using oriented Gabor filters in Python. The tool was modified to make it work and the final version that was used is shared in my public GitHub account, but all credits are for the original author: https://github.com/ylevalle/Fingerprint-Enhancement-Python. The original tool is based on the paper: ¬ЂPakutharivu, P. & Srinath, M.V.. (2017). Analysis of Fingerprint Image Enhancement Using Gabor Filtering With Different Orientation Field Values¬ї. Other methods can be used to enhance the fingerprint such as image editing software, depending upon individual comfort with this type of tool.

Figure 5 and 6¬† –¬†Enhanced fingerprint results using the fingerprint enhancement tool
- The enhanced.JPG file is converted to an SVG (Scalable Vector Graphics file) with a free online tool, then importing the SVG file into Tinkercad https://www.tinkercad.com or another 3D CAD design software to create a 3D model of the fingerprint.
- Configure the fingerprint length and width according to the measures of the original latent fingerprint, put a thin back block with 0.5 mm height or more behind the fingerprint, configure the ridge height and create two different 3D models: one negative or hollow for casting and one positive for direct tests. Human fingerprint ridges, in general have a height between 60 +/- 20 microns. Unfortunately an electron microscope was not available to measure micron-based differences in the fingerprint ridges. Also FDM or filament 3D printers could not be used for these attacks as they needed the precision of a UV Resin printer, the precision of a domestic UV Resin printer is 25 microns.
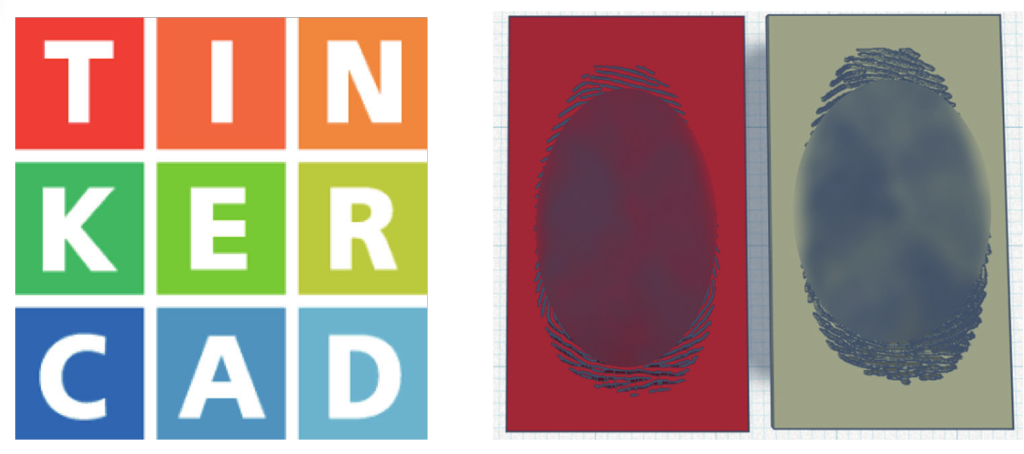
Figure 7 and 8 – Tinkercad logo and 3D models of the fingerprint
- Export the 3D model file in a 3D printable file format (STL) and upload it on the Anycubic Photon 3D resin printer. The printer settings must be configured according to the UV resin that will be used. The models were printed in different positions and orientations, several retries were required to achieve the optimal printer settings and ridge height. The best results were obtained when printing the models in vertical position and with a 25-micron resolution.
- Once the printing is completed, the 3D printed moulds require rinsing in Isopropyl alcohol (IPA) to remove any uncured resin from their surface. After the rinsed parts dry, the moulds require post-curing using an UV-post curing lamp or direct sunlight, which helps the parts to reach their highest possible strength and stability.
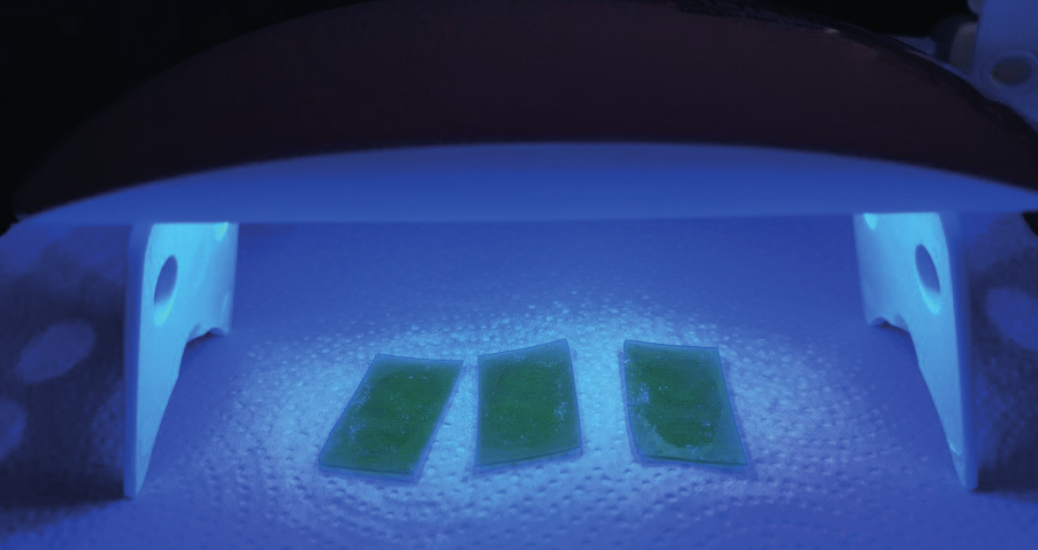
Figure 9 – UV Post Curing Lamp
Fill the 3D printed negative or hollow moulds with:
- Liquid latex: To cast the finger the 3D printed moulds were filled with just a few drops of liquid latex, from experience, thin fake fingers work better than thicker ones. It takes from 10 minutes to one hour to dry depending on the thickness applied. As it dries, it solidifies to a rubbery consistency.
- Wood glue: To cast the finger the 3D printed moulds were filled with just a little wood glue. It takes from 20 minutes to several hours to dry depending on the thickness applied.
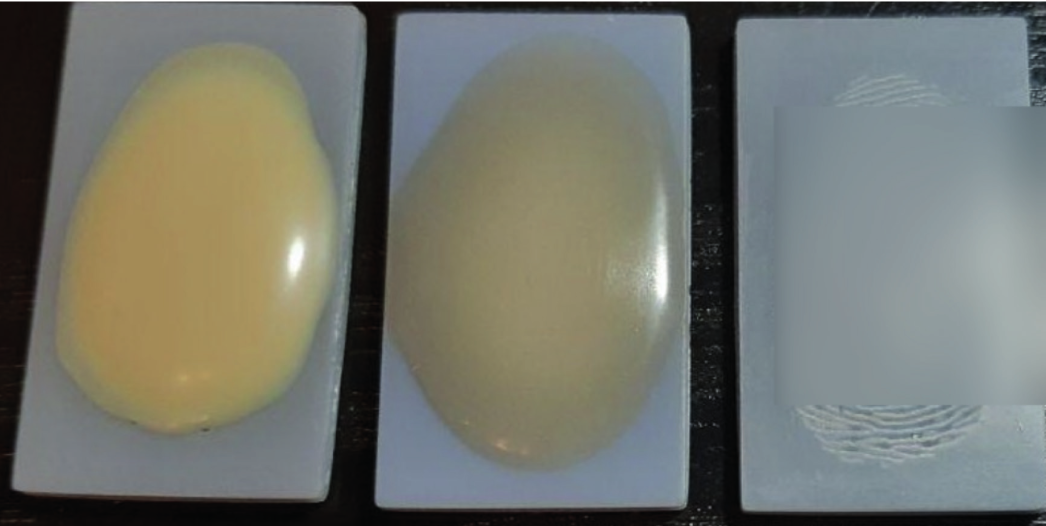
Figure 10 – Casting the 3D printed moulds with liquid latex and wood glue
The fingerprint obtained from the 3D mould with liquid latex or wood glue casting worked on all sensors, and the positive fingerprint printed directly on UV resin worked on the ultrasonic sensor and in one of the optical sensors.

Figure 11 – Non cooperative attacks with 3D printing results
Demo of the attack on the Samsung Galaxy S10 phone: watch video
A whitepaper was published that can be downloaded for more details: DOWNLOAD BYPASSING BIOMETRIC SYSTEMS
Also, this research was presented at Defcon Safe Mode a few weeks ago, the video of the talk and the Q&A session can be accessed in the following links:
https://www.youtube.com/watch?v=hJ35ApLKpN4
https://www.twitch.tv/videos/704531833
______
References and Related Content:
- https://blog.talosintelligence.com/2020/04/fingerprint-research.html
- https://msutoday.msu.edu/news/2017/real-or-fake-creating-fingers-to-protect-identities/
- http://biometrics.cse.msu.edu/Publications/Fingerprint/CaoJain_HackingMobilePhonesUsing2DPrintedFingerprint_MSU-CSE-16-2.pdf
- Chugh, Tarang & Jain, Anil. (2018). Fingerprint Presentation Attack Detection: Generalization and Efficiency.
- Pakutharivu, P. & Srinath, M.V.. (2017). Analysis of Fingerprint Image Enhancement Using Gabor Filtering With Different Orientation Field Values. Indonesian Journal of Electrical Engineering and Computer Science. 5. 427-432. 10.11591/ijeecs.v5.i2.pp427-432.
- Galbally, Javier & Marcel, Sébastien & Fierrez, Julian. (2014). Image Quality Assessment for Fake Biometric Detection: Application to Iris, Fingerprint and Face Recognition. IEEE Trans. on Image Processing. 23. 710-724. 10.1109/TIP.2013.2292332.
- Wiehe, Anders & Org, Anders@wiehe & S√Єndrol, Torkjel. (2005). Attacking Fingerprint Sensors.
